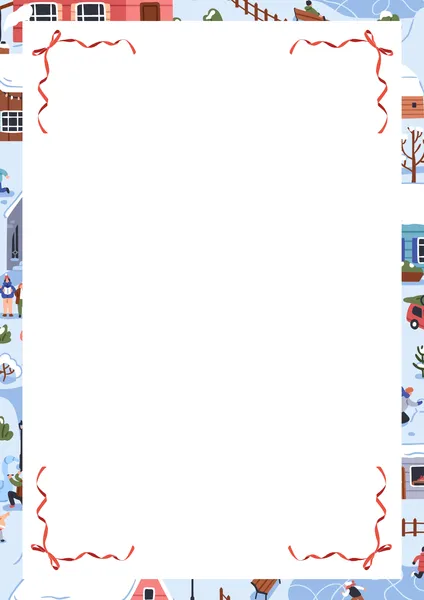
“Want your flyers to ‘pop’?” Our guide to flyer borders offers practical design tips, free downloadable templates, and resources to help you create stunning visuals.”
Have you ever noticed some flyers that grab your attention and some that fade into the background? While compelling content and striking images are essential, a subtle yet powerful design element often makes the difference: the border.
Good flyer borders can make simple paper into a professionally incredible advertisement, announcement, or even an invitation. This comprehensive guide explores the world of flyer borders, discovering why they’re so effective and how you can use them to create stunning designs.
What is a Flyer Border?
A flyer border is a visual frame around the prominent corner of your flyer. They are a line, pattern, or design that follows along the edges and marks the line difference between the data and the background. Simplicity to intricacy borders are available in various styles to fit any need.
Why Use a Border on Your Flyers?
A border is more than just a decorative touch; it serves several crucial functions:
- Enhances Visual Appeal: A border adds a finish, a polish, that prevents the design from floating in space, so to speak.
- Creates Focus: A border can frame the content, drawing the viewer’s eye inwards, highlighting important information, and making content more legible.
- Provides Structure and Organization: A border organizes elements and gives meaning to a visual hierarchy while making information more digestible.
- Sets the Tone and Mood: The border sends a message by its style. EA floral or geometric border might convey elegance or a modern feel.
- Protects Content (Print Considerations): Cutting text or images off on the edge of a paper can be prevented by a border.
Types of Flyer Borders: The Evolution of Style From Simple to Elaborate
Flyer borders come in a wide variety of styles. Here are some of the most common types:
Solid Line Borders:
Single line or multiple parallel lines: the simplest, most versatile type. Clean, classic look, suitable for any flyer.
Dotted or Dashed Line Borders:
They have a little touch of playfulness or informality or a little bit of movement or direction.
Decorative Borders:
Illustrations and graphic elements branding these feature patterns are vital to adding visual interest and reinforcing the flyer’s theme. Examples include floral, geometric, abstract, or themed borders (e.g., Christmas; Halloween).
Textured Borders:
These are like the texture of wood, metal, or fabric and provide a tactile pliancy with a visually interesting look.
Shaped Borders:
These use curves, waves, or some shape to make a frame unlike anything you’ve seen or will ever see on a digital device.
Choosing the Right Flyer Border for Your Design
Selecting the ideal border depends on several factors:
- Purpose of the Flyer: Is it an invitation, an advertisement, or an announcement? The border is used to match the occasion.
- Content of the Flyer: The border is ideally set to contrast with the text and images but not directly clash.
- Target Audience: What do they look like? For a younger audience, you could use more playful borders; a professional audience will enjoy more sophisticated borders.
- Overall Design and Branding: The border should work together (ideally in harmony) with other design elements such as colors, fonts, and your brand identity.
Tips for Using Flyer Borders Effectively
- Don’t Overdo It: A border should never overwhelm, but at the same time, it should always do its job to convey—and enhance—whatever lies behind it. Do not design in an overly busy or distracting manner.
- Consider Color and Contrast: The borders should match the color scheme of the flyer. For emphasis, use contrasting colors or similar colors for a subtle effect.
- Think About Thickness and Weight: A thin border is elegant, and a thick border is bold and attention-grabbing.
- Maintain Consistency (Especially for Series): Developing uniform border styles in multiple flyers helps you build a unique brand identity.
- Use White Space (Negative Space): Don’t get content too close to the border. Don’t occupy too much space to ensure it is not cramped.
Free Flyer Border Templates and Resources
Simple Line Borders (Downloadable Pack): A single, double, and triple line set. Formats: PNG, SVG.
Decorative Floral Borders (Downloadable Pack): Floral patterns assortment good for wedding or spring sales. Formats: PNG, JPG.
Geometric Borders (Downloadable Pack): Clean, modern, geometric patterns for business flyers or professional announcements. Formats: SVG, PNG.
Links to Online Border Resources: More border options can be found through websites like Canva, Creative Market, or any other stock image sites.
Creating Your Flyer Borders:
While using pre-made templates and resources can be convenient, creating your flyer borders allows maximum customization and creative expression. Here’s a breakdown of different methods and tools you can use:
1. Graphic Design Software (Professional Options):
Adobe Photoshop: Raster graphics editor Photoshop is perfect for rendering detailed and complex borders. There are a lot of styles that you can get with the use of brushes, shapes, philters, and layer effects.
Tips for Photoshop:
- Precise geometric borders can be created with the Shape tools (Rectangle, Ellipse, or Custom Shape).
- Explore the Brush tool, suitable for hand drawing or texturing effects.
- Continue from here to experiment with layer styles (Drop Shadow, Stroke, Bevel, & Emboss) to add depth and dimension.
- Borders made from patterns and textures add some visual appeal.
Adobe Illustrator:
Vector is what Illustrator is, so it is perfect to create scalable borders that do not lose quality as they are resized. It works exceptionally well with clean and geometric designs and intricate illustrations.
Tips for Illustrator:
- Shapes tools and Pathfinder panels are your friends if you want to combine objects to make more complex shapes. Using the stroke panel, you can control line weight, style, and corner, which are optional.
- Wrinkle them into custom patterns, and then apply them to borders.
- Precise drawing and creating custom shapes is tackled using the Pen tool.
Adobe InDesign:
Although mainly used as a page layout program (though it can do simple borders, without which there’s simply no life to a multi-page document), it works best when precise placement is needed.
Tips for InDesign:
- How do you use the Rectangle Frame tool and add two lines, respectively, using strokes to get basic borders?
- Create reusable border styles with Object Styles.
- If you want more complex borders, import graphics you create in Photoshop or Illustrator.
2. Online Design Tools (User-Friendly Options):
Canva: Canva is an easy-to-use online design tool with many pre-made elements, such as borders. It’s an excellent option for newbies and people who must make quick designs.
Tips for Canva:
- In the elements library, search for “borders” or for specific border styles (such as “floral borders” or “geometric borders”).
- A set of pre-made boards that can be customized with border colors, sizes, and conditions.
- You can use shapes, icons, and other graphics on the Elements tab to create custom borders.
PicMonkey:
PicMonkey operates similarly to Canva in that graphics and effects can be used with their easy-to-use design tools to create borders.
Tips for PicMonkey:
- The Frames tool is excellent for fast and easy border creation.
- Visit the Textures and Effects tabs to spice things up with your borders.
3. Word Processing Programs (Basic Options):
Microsoft Word/Google Docs: Word processing programs do not offer the best options for complex design, but basic borders will suffice for basic flyers.
Tips for Word/Docs:
- Use the ‘Page Borders’ or ‘Shape’ tools to make simple line borders.
- For simple decorative elements within the border, use clip art or images.
General Tips for Creating Your Borders:
Start with a Sketch: Before diving into the digital side, sketch out your border ideas on paper to get a sense of your border’s design.
- Consider the Flyer’s Theme: The border should complement the whole top message of your flyer.
- Use High-Resolution Images: If you’re using images or patterns in your border, be sure they are of high resolution so they don’t pixelate.
- Maintain Consistent Spacing: Make sure your content is spaced the same amount on the border.
- Save in Appropriate Formats: Keep your borders in formats like PNG (for web use) or SVG (for vector graphics with no loss of quality when scaled).
Conclusion: The Power of the Frame
Flyer borders are a small but impactful design element. If you can understand the different types of flyers and ways to use them, you can make eye-catching flyers that get people’s attention and convey your message. Today, start experimenting with our free templates!
