Bullet journaling is a valuable technique for organizing ourselves, monitoring our habits, and having a creative outlet.
As established, rapid logging systems and collections are the heart and soul of bullet journaling; however, visuals are another essential component of our bullet journals as they make them functional and beautiful. Still, one of the elements that may significantly improve a bullet journal is borders.
A border is a frame that divides some parts, attracts attention to certain information, and gives more individuality to the pages. They can turn the tabular data into a more fun aesthetic spread to browse.
This article will explore the diverse world of journal borders, discussing various styles and techniques for creating custom borders and how they can enhance organization and visual appeal.
Why Use Borders in Your Bullet Journal?
Before diving into border styles, let’s understand why they are so effective in bullet journaling:
Organization
Dividers make it easy to demarcate various forms of organization, including daily checklists, weekly overviews, monthly calendars, and groups. If you have to pick up some information, you can do it quickly, and your journal will not look too crowded.
Emphasis
Boundaries can remind learners of items that should be emphasized, such as dates, deadlines, or targets. By framing, you underline them and ensure you do not lose them in your notes.
Visual Appeal
The decoration brought by borders makes journals far more pleasant, attractive, and convenient to use. They can represent your personality and make the organization seem more interesting.
Structure
Although using borders may seem unconventional, it is also helpful in establishing flawless structure and journal formation.
If there are specific areas where the system is more fluid, it is beneficial to establish more explicit rules to keep everything in relative order.
Exploring Different Border Styles
The range of borders is boundless, and every woman can choose what she likes most. Here are a few popular options:
1. Simple Lines:
- Single Line: A clean, understated border. Suitable for making daily reports or dividing a specific part of the day.
- Visual: A faint line, which in principle is black, that is located around a text box.
- Double Line: A little more stress than a single line exerts. They are best suited for the once-a-week timetable or, better yet, for creating specific collections.
- Visual: An instance of two lines, drawn horizontally or very nearly so, on each side of a portion.
- Triple Line: Creates a bolder division for simple headings for monthly, weekly, and daily calendars and important page headings.
- Visual: Three horizontal lines in the form of train railroad tracks are below a title.
- Thick and Thin Lines: Another favorable aspect of these diagrams is that they break the monotony of having the same line thickness by switching between them.
- Visual: Single line; thick line and then a thin line side by side; the pattern is repeated to encircle the border only.
2. Dotted and Dashed Lines:
- Dotted Line: Itanily is unsubtle and can be delicate when used to add some texture to any dish without being dominating.
- Visual: A row of consecutive and equal-spaced dots makes the outer border.
- Dashed Line: A little thicker than dots and gives a neat and clear appearance.
- Visual: Short parallel lines, evenly space imitating a broken line.
- Varying Dot/Dash Size: Improves the understanding of the text by changing the sizes of the dots or dashes in turn.
- Visual: A border of line work that may be either large and small dotted lines or long and short dashed lines.
3. Wavy and Loopy Lines:
- Gentle Waves: Develops a silky edge appropriate for any nature special interest spreads.
- Visual: A straight line repeated in a curved line, such as a line of waves.
- Sharp Waves (Zigzags): Diversifies proceedings and gives them an upbeat mood.
- Visual: A jagged line can be either vertical or horizontal.
- Loops and Swirls: Gives a curative and light border.
- Visual: A wavy line similar to writing in script form.
4. Geometric Patterns:
- Squares and Rectangles: Gives a neat and systematic outlook.
- Visual: Copied squares or rectangles may be connected or isolated.
- Triangles: Adds a sharp and modern feel.
- Visual: An array of triangles randomly pointing upward or downward or in both directions.
- Circles and Arcs: Organises another more gentle geometric frame.
- Visual: Linked circles or a chain of semi-circles.
- Combining Shapes: In manifesting the present findings, more elaborate patterns are produced, which are more engaging and intricate.
- Visual: A border where, when starting from one corner, the next shape is a square,e, and the following shape is a triangle, or circ, le, and line successively.
5. Nature-Inspired Borders:
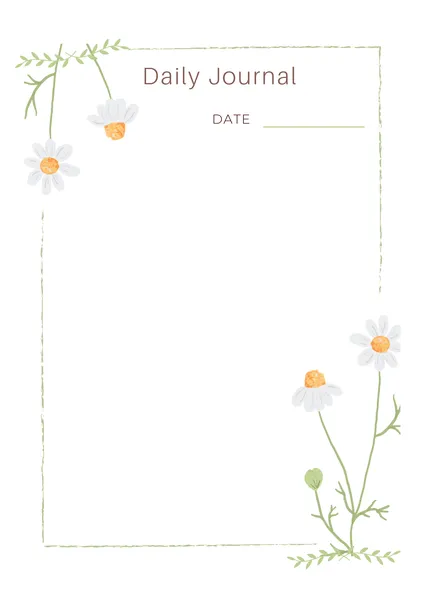
- Leaves and Vines: Help make the setting identify more organic and natural.
- Visual: A frame with handwritten or stamped ornaments in the form of individual elements of a leaf or vine passing around the sheet.
- Flowers: Summarises a somewhat girly and Quite an excellent Touch.
- Visual: Getting by with repeating flowers, plain or complex.
- Branches and Twigs: This adds dimension to the house, giving it a natural and rough feel.
- Visual: A boundary formed by thin lines pointing towards branches with minor extensions.
6. Decorative Borders:
- Banner Borders: Given they are routines, they foster a feeling that they are unique and should be treated as such.
- Visual: It might look like a waving banner or ribbon and is predominantly used to make titles.
- Chain Borders: Allows a linked and connected sense to be obtained.
- Visual: A border created by several chain links, whether plain or with some degree of design.
- Lace Borders: It gives an exquisite and complex design.
- Visual: Repeating the patterns and fine lines, this border looks like a lace fabric.
7. Using Tools for Borders:
- Washi Tape: This is very useful in achieving a fast and convenient method of applying colored and patterned borders in sewing.
- Visual: Pinning a piece of decorative washi tape to a particular area, primarily its border.
- Stencils: Delivers well-defined shapes and patterns, more so in geometric form or other complex layouts.
- Visual: Drawing of several printmaker’s repetition patterns using a pen or marker while tracing them from a stencil.
- Stamps: They add quick and consistent designs, particularly when repeatedly creating motifs or icons.
- Visual: Stencilling the inner part of a shape and using a simple stamp that features a line of leaves to make the border.
Remember, you can simultaneously use several styles and techniques to create borders! But ultimately, please don’t be afraid to have fun and explore it!
Cute Journal Borders
Creating Custom Borders
If you prefer, pre-made borders are easy to obtain. Drawing your borders is just as easy and maybe more enjoyable. Here are a few techniques:
- Hand-Drawn Borders: This is the simplest method out of the three. You might use different pens, markers, or colored pencils to draw your borders. Versatile with line thickness, pattern, and texture as well.
- Stencils:
- Stencils are an accurate method of painting/drivers for geometric patterns, shapes, and any other designs needed by any individual or group. It has been shown that they are instrumental when drawing complex borders without drawing finesse.
- Rulers and Straight Edges: To give the artwork exact lines, it is wise to use a ruler or any straight edge, particularly when creating simple line borders or geometric designs.
- Combining Different Techniques: You are encouraged to combine techniques to achieve border designs. For instance, using a ruler, one can draw straight lines and provide hand-drawn flowers as florals.
Using Borders to Enhance Organization and Visual Appeal
Here are some practical ways to incorporate borders into your bullet journal:
Framing Daily Logs
Using a solid or dashed border around each day’s entry on your daily log is more professional. This results in clear day division, making it easy to review previous entries and plan for the future.
Highlighting Weekly Spreads
For a weekly layout, you can use geometric borders or banner border designs to give the layout a more attention-catching appearance. This makes it different from the rest of the pages of your journal.
Creating Collections
Different border styles must be used for other collections. For instance, if you have a collection dedicated to garden planning, it is reasonable to apply floral borders; geometric borders will suit a collection with project tracking.
Emphasizing Important Information
Place an important date, deadline, or goal on a decorative, banner, or floral border.
Adding Visual Interest to Title Pages
When creating the design for dividing the content by sections, you can create complex borders around the title pages of the monthly or yearly segments. This forms a visually impressive way of ushering a new section in the flow of the dissertation.
Tips for Effective Border Use
- Consistency: Make sure your borders are uniform throughout your journal to give it a good flow.
- Balance: Do not overuse borders in your page designs by placing too many within single pages. Employ them effectively to achieve better organizational sophistication without the appearance of clutter in your journal.
- Personal Style: Select borders appropriate to your character and tastes.
- Experimentation: It is crucial to remember that you don’t have to stick with one style and technique for adding borders. My main advice is to relax and focus on making an enjoyable journal.
Having borders helps organize the bullet journal and adds aesthetic value to it. Whether you think only horizontal or vertical lines are enough or like more complicated patterns, borders can be valuable in creating a convenient and fine-looking journal. So, grab your pens, markers, and washi tape, and start exploring the creative world of journal borders!
